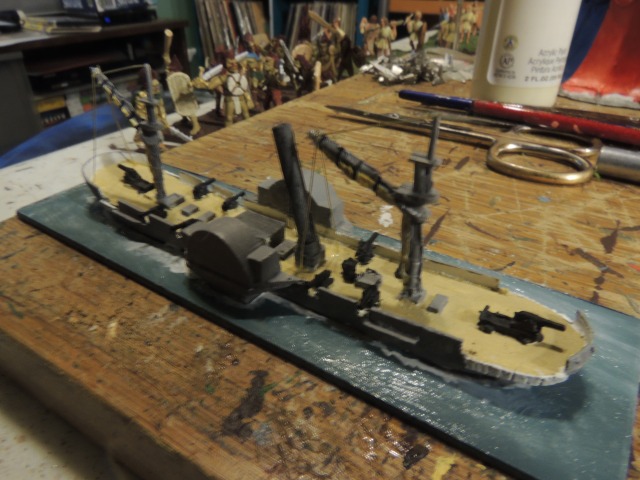
The U.S.S. Miami was a double end gunboat intended to patrol America’s coasts and inland waters during the American Civil War. With rudders at both ends, the intent was to avoid having to turn the good-sized gunboat around in narrow waters. Most were built of green wood and deteriorated rapidly after the war. But some had long and productive careers. The gunboat Monocacy served on China’s inland rivers until the the turn of the 20th century.

A quick comparison between the Thoroughbred Sassacus double-ender (front) and the less massive Bay Miami (back) Both are very nice models
I’ve shown you a few pictures of my Bay Area Yards miniature of the Miami. I believe it’s my fourth double end gunboat. There were more than forty built in four different classes. I also have two of the Sassacus class by Thoroughbred Miniatures and one that is a scratch-built model. It’s good to have plenty because they were fairly ubiquitous on the rivers off Chesapeake bay and the Atlantic coast.

Portside view of the Miami. the base colors are all there, but no additional work on the base and beginning to think about rigging.
The Bay Model is the only one made of the Miami and her sister the Octarora. It’s considerably different in configuration than the Sassacus miniature pictured. It is relatively easy to build. I purchased the resin hull separately and purchased the masts, also from Bay. I had quite a collection of Bay guns, if not those would be separate purchases as well. The ship has only two masts, and I had to place them appropriately. I probably cut too much off the ends of the masts–they should definitely be taller. I used my pin vise to drill holes in the resin deck. Not difficult. Then I placed large rifles on pivots at either end of the ship. The Dahlgrens mounted on Marsilly carrigages were glued at each gun port.
After priming the whole business I started work. I used Vallejo Buff for the deck. Then I painted the interior bulwarks white. I feel like I erred on the color of the gun carriages. I should have used the Vallejo Neutral Gray color, which is a nice middling shade and a better contrast with the black of the gun tubes than the Ceramcoat Charcoal I chose. I used Vallejo Sea Gray for the overall exterior color, including the stack which I washed black. I chose not to do an overall wash. I normally would, but there isn’t a ton of detail to bring out in this miniature, so I was afraid it would just make a pool, except maybe on the decking.
With the painting done, I contemplated rigging the ship. For the most part I’ve rigged my models in recent years. I try to keep it simple. I don’t use thread. Pre-stretched, cotton, acrylic, it doesn’t matter to me, thread rigging sags. I have a beautiful model of the Hartford to prove it. Instead, I use brass wire, glued with CA glue. I buy .010″ brass wire from Metal Shapes. It’s available at Hobby Lobby, and is the only product which drags me in that store. I try to cut the length of wire as close as I can to the length I need it, glue it in place and use floss scissors to cut the wire as close as I can get it. I let it dry a good long time. If I don’t want to end up with bristles glued together; who needs that? Then I paint it black. I always try to do what is easy with rigging, because ultimately it’s a wargame model and not a showpiece behind a glass case.
In addition to taking on standing rigging, I also add ratlines. I wasn’t sure there were ratlines on the double ender’s simple pole masts, but I checked photos and drawings, and they are there. Battlefleet Models makes 1/700 scale ratlines, so scalewise they are a bit small, but really do add something to your model. They are photo etched brass and taking a bit of patience to work with. The ratlines come in a variety of sizes, choose yours carefully. Use an extremely sharp knife or floss scissors. Again I glue them in place with CA glue. Painting the ratlines can be a real challenge. They are metal and almost impossible to prime. I paint them black, and try to thin down my acrylics. The ratlines are very fine and easy to glop up.
Finally, you can mount your minis on a base or not–entirely up to you. I do. I mount my ships on thick styrene bases. I like to leave a bit of a margin around the ship. I painted the base a nice coastal Vallejo Blue Gray. I also scrubbed the base a bit with Vallejo Pale Blue, before going around the ship with your basic white. When it’s all over I paint over the base with Liquitex gloss gel


